Some vital tips for providing cement plaster on wall surface

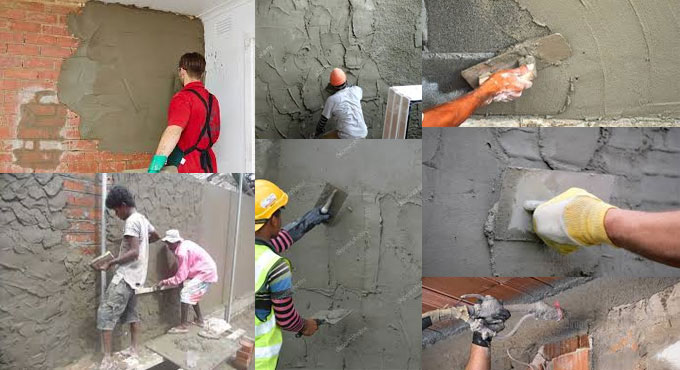
Cement plastering is normally applied to provide perfect coating to the outside and inside surface of wall. Cement plaster is normally given in a single coat or double coat. Double coat plaster is suitable where thickness of plaster is retained in excess of 15 mm or when it is necessary to maintain a very fine finish. The method for double coat cement plaster involves the following 5 steps.
a. Step-1-Making the surface ready for plastering
b. Step-2-Ground work for plaster
c. Step-3-Providing first coat (or under coat or rendering coat)
d. Step-4-Providing second coat (or finishing coat or fine coat)
STEP-1 (MAKING THE SURFACE READY FOR PLASTERING)
1. Retain all the mortar joints of wall rough, in order to maintain a good bonding to retain plaster.
2. Use a wire brush to cleanse all the joints and surfaces of the wall with a wire brush, the wall surface does not contain any oil or grease etc. left on wall surface.
3. In case the surface is smooth or the plastering wall is old one, then extract the mortar joint to a depth of minimum 12 mm to provide a superior bonding to the plaster.
4. If the projection on the wall surface remains over 12 mm, then rub it out to maintain a smooth surface of wall. It will minimize the consumption of plaster.
5. For any cavities or holes on the surface, fill it with exact material beforehand.
6. Roughen the whole wall to be plastered.
7. Wash the mortar joints and whole wall to be plastered, and make it wet for minimum 6 hours prior to use cement plaster.
STEP-2 (GROUND WORK FOR PLASTER)
1. To maintain smooth thickness of plastering all through the wall surface, initially settle dots on the wall. A dot belongs to patch of plaster with size 15 mm * 15 mm and thickness of about 10 mm.
2. Initially, dots are set on the wall horizontally and then vertically at a spacing of about 2 meters coating the whole wall surface.
3. With the help of plumb-bob, examine the verticality of dots, one over the other.
4. Once the dots are set, the vertical strips of plaster alias screeds are arranged among the dots. These screeds function as the gauges for retaining smooth thickness of plastering to be used.
STEP-3 (PROVIDING FIRST COAT OR UNDER COAT OR RENDERING COAT)
1. For brick masonry the thickness of first coat plaster usually remains 12 mm and for concrete masonry this thickness differs from 9 to 15 mm.
2. The proportion of cement and sand for first coat plaster differs from 1:3 to 1:6.
3. By using a trowel, provide the first coat of plaster among the spaces developed with the screeds on the wall surface.
4. The surface should be leveled with flat wooden floats and wooden straight edges.
5. Once the leveling is finished, leave the first coat to set but not to dry and then roughen it by a scratching tool to develop a key to the second coat of plaster.
STEP-4 (PROVIDING SECOND COAT OR FINISHING COAT OR FINE COAT)
1. The thickness of second coat or finishing coat may differ from 2 to 3 mm.
2. The proportion of cement and sand for second coat plaster differs from 1:4 to 1:6.
3. Prior to provide the second coat, moist the first coat uniformly.
4. Provide the finishing coat with wooden floats to a perfect uniform surface and apply finishing touch with a steel trowel.
5. If possible, the finishing coat should be provided starting from top towards bottom and finished in one operation to remove joining marks.
As soon as the plastering work is completed, water should be sprinkled over it to keep moist for minimum 7 days to maintain strength and hardness.