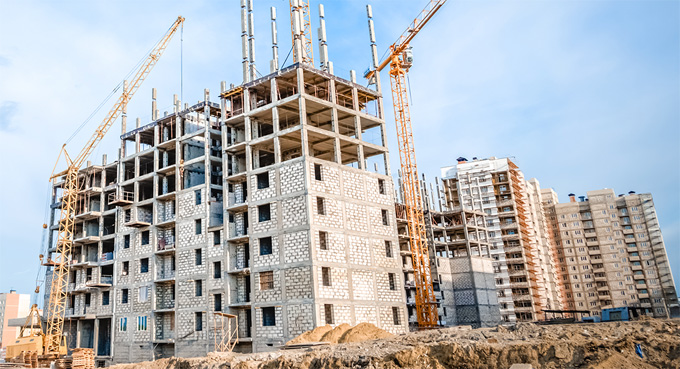
A Quick Guide to Residential Building Construction

Construction stages of residential buildings
Site cleaning stage
In the construction of residential buildings, the site should be cleaned in case any plants or rubbish are there. The old building foundation also needs to be removed, as the old foundation may disturb the foundation of the new house.
Ground marking stage
After cleaning the construction site, the engineer marks the construction plan on the ground. This process helps to get an idea about the sizes of the house, including the room sizes and the outside areas of the house.
Excavation process
In the next step, the excavation process has been initiated for the footing work.
Foundation stage
After the excavation work, the foundation work has been carried out for the residential buildings. In the case of the shallow foundation, the isolated footing has been followed, and for the deep foundation, the pile foundation work has been carried out.
Raising the ground level
After doing the foundation work, the ground level of the construction site has been raised above the road level.
Beam construction
In the next step, the beam has been reinforced and concreted above the brickwork, and this can be done based on the required standards. The thickness of the beam has been decided on the basis of the span between the columns.
Filling process
To raise the floor level, soil has been used, and it is allowed to dry to be laid all over the floor.
Column construction
In the next step, the column has been reinforced from the foundation level. The column reinforcement has been raised above the roof level, as a result, the lapping for the next floor column reinforcement can be easy.
Brick work
The wall alignment should be done and checked properly on the basis of the design requirements before laying the bricks. The bricks have been laid up to 2.5 or 3 feet on the basis of the sill level.
Lintel beam, sunshade and loft construction
In the next step, the bricks have been laid up to the lintel level. At the same time, the shuttering for reinforcement and the concrete process have been done for the lintel beam, sunshade and loft.
Roof construction
In the next step, the brickwork has been done on the lintel beam up to the roof level of the house. After completing the brickwork to the roof level, the curing process needs to be done for the brickwork. In the next step, the roof centring work has been done on the basis of the required standard. The shuttering work has also been done on the basis of the slab reinforcement and design of the roof structure. In the roof slab, the electrical pipes have been placed, which helps to pass the wires throughout the entire house. After that, the concrete has been poured on the roof. In this context, the thickness of the concrete should be 5 to 6 inches. During the roof concrete process, the availability of enough materials, including sand, jelly, electricity and water, needs to be ensured.
Curing
After completing the roof concreting process, the curing process of the roof concrete needs to be initiated, and it has been done for the next 24 days.
Deshuttering process
In the next step, the beam and roof shutters or moulds have been removed after 14 days of the roof concrete process. In the case of the roof slab’s span length is shorter, the shutters have been removed after 7 to 10 days of the roof concrete process.
Electrical works
After drying the walls, the piping for the electrical works has been done at the required place. In this step, the switchboard boxes and electrical pipes have been placed through cutting the walls.
Frame construction for windows and doors
In the next step, the frames for doors and windows have been made ready and fixed at the respective openings.
Plastering works
The plastering work has been done using cement mortar. This is a time-consuming procedure, which has been done on the inner and outer walls of the building. The plaster will be 12 mm thick. The plaster for the ceiling probation has been done first, and then the wall plaster has been done in the case of the inner plastering process. After completing the plastering work, the curing process needs to be initiated and continued for at least 7 days.
Plumbing works
After completing the entire plastering work and its curing process, the plumbing work has been initiated. The water tank has been placed and the water pipe has been connected to the tank and taken to the kitchen areas, toilet areas and other required areas. The walls have been cut to place the pipes inside the walls. In addition, the connection for the outer pipes has also been done for carrying out the wastewater from the kitchen, toilet, wash basin and other areas. The toilet and septic tank are connected in this step. The type and size of the plumbing pipe have been varied on the basis of the places in which it has been used. The patchwork for the wall has been done after completing the plumbing work.
Painting work
The painting work has been initiated after the completion of all patchworks. In this step, 2 coats of primer have been painted on the outside of the building, and 1 or 2 coats of primer have been applied to the inner walls.
To learn more, watch the following video tutorial.
Video Source: AF Channel
After that, 2 coats of putty and 1 coat of colour paint have been applied to the inner walls.
Tile laying process
The floor level for each room should be checked before laying the tiles. The tiles have been laid on the floor and walls of the house. The wall tiles have been laid in the kitchen areas, basin areas and toilet areas. The grouting for the tiles has been done after laying all the tiles in the required places.


