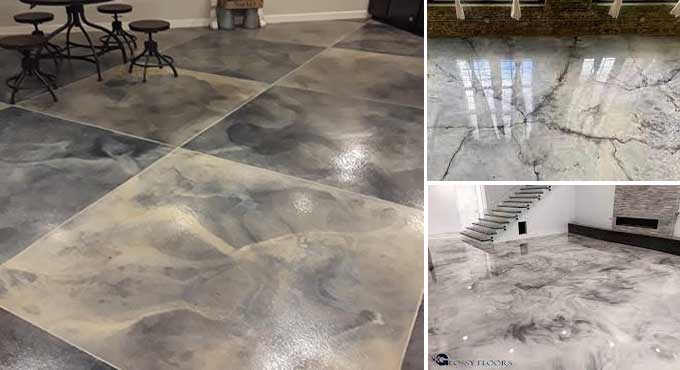
A Step-by-Step Guide to Constructing Concrete Marble for Unique Home Decoration
People often associate concrete with sidewalks and driveways, roads, and buildings. You do not really see the diversity of concrete in the objects you use every day, but they are not the most glamorous. Concrete can make decorative countertops, furniture pieces, and other unique works of art.
Concrete Marble Construction Process
Mixture
Fibers and admixtures are the last things you add to the mix. The mixer tends to bind up when these ingredients are added at the end, so adding them helps prevent that slowly.
You do not want the mixture to be too fluid, so it should have the consistency of taffy. But it must still move around the form to form natural looking veins. In addition, you do not let it dry so much that it leaves big voids on the construction project face to fill. Your mix should feel sticky compared to regular concrete after mixing it in your fibers.
Dusting
A key component of the process is how the forms are dusted. Every technique has its benefits, and everyone has their process. You will make something unique no matter what you do. Put about a half handful of powder in your hand and stand a few feet away from the form.
Nature will take care of the rest after you throw the powder at the form. It should be scattered randomly throughout your form since you can always add more. A similar approach can also be taken by blowing out the form and reintroducing it.
A pattern across the entire concrete face will most likely require multiple throws of bigger pieces. It is crucial that you avoid getting a huge buildup of powder in the corners of the form; it will ruin your concrete. Throw any built-up powder back into the form using a scraper and a flick of the wrist.
Casting
The mix can be slightly wetter than normal, resulting in more blooms on the table, creating the illusion of fireworks.
1. You can fill the bucket with concrete and place it on my casting table, then carefully lay the mix over the powder. Putting so much powder in one place will result in concrete rolling over it. Instead of having clear and concise marbling and veining, the piece becomes a bit cloudy from steamrolling.
2. Place handfuls of your mix onto the powder when it has reached your desired consistency.
3. After you have a couple of continuously touching handfuls, gently massage the backs of the handfuls to ensure the powder stays in place.
4. Make sure you massage the edges of your forms well to prevent as many air bubbles on the sides as possible as you place handfuls and fill up your forms. You can cover up the piece by leveling the back with your forms.
Polishing
It is possible to flip the piece over the next day after casting if you remove the form edges carefully. Basically, if you look at it you want to make sure there aren't any huge voids or huge dust buildups on the face, which may have caused some disfigurement.
This will look nothing like the finished concrete, but you want to ensure there are no massive voids or huge dust build-ups.
1. The top layer of concrete, sometimes called the cream, can be cleaned off with a wet polisher and diamond polishing pad. You should keep the surface wet, and make sure that the polisher is kept even.
2. After the whole face has been cleaned up, you should see some small holes. Despite their best efforts, they could not remove all the air bubbles without disturbing the powder beneath the concrete. To fill all holes on the surface, prepare slurry of cement, sand, water, and pigment of your choice.
3. Using a paint scraper to scrape off any excess slurry after the first pass allows you to see if you missed anything. To clean the top, wipe it clean with a damp rag after filling all the holes.
Flip & Move
Spending this much time pouring over forms, weighing and measuring ingredients, only to fumble and break your piece in the middle of processing or installation.
1. The way you remove your forms, you don't yank side rails, slam drills, or anything like that. Even though concrete has massive compression strengths, a hairline crack can easily form, or a corner can be chipped, especially in green concrete.
2. You move a piece from the casting table to the polishing table, there are no obstacles around. As a result, you need at least one extra person than you consider necessary. Even though it may take an extra hour, it is better than explaining to a customer why their project will take longer than expected.
To learn more, watch the following video tutorial.
Video Source: CONCRETE CONCRETE
3. Whenever you move your castings, keep your tensile strength in mind. It is common for concrete to crack before it bends. If you would like to use your mix instead of rebar, you can use a high load of fiber.
4. You can gradually wedge shims underneath in an even pattern if concrete bonds to your form when flipped out. Once the entire piece pops out, it should be easy to clean up. The concrete should now be able to be flipped over so that it can be processed safely beneath.
Wrapping it Up
Your view of furniture and concrete applications has completely changed as a result of this process of making concrete. The design process is constantly evolving and changing.
This technique is used by craftsmen all over the world to achieve interesting results. There are many different ways to transform a mixture into something that has never been seen before, and every person has a different perspective.